How to label moving boxes: your 2026 guide

TL;DR:
- Labeling moving boxes with clear destination rooms and detailed contents reduces unpacking time and prevents damage. Using durable materials, color-coding, and detailed descriptions helps the removal crew unload efficiently and accurately. Digital tools complement physical labels, offering a searchable inventory for quicker item location after the move.
Labelling moving boxes effectively means assigning each box a clear destination room and a detailed contents description before a single item leaves your home. The British Association of Removers recommends marking boxes on multiple sides so labels stay visible throughout transit and stacking. Done correctly, a good labelling system for packing cuts unpacking time significantly, reduces the risk of damaged items, and tells your removal crew exactly where every box belongs. This guide covers the materials you need, the correct technique, colour-coding methods, common mistakes, and how digital tools can support your physical labels.
What materials do you need for labelling moving boxes?
The right tools make labelling faster and more durable. Cheap supplies fail under the physical demands of a move, so choosing professional-grade materials from the start pays off.
The core supplies you need:
- Permanent waterproof markers or thick black pens. Fine-tipped pens fade or bleed on cardboard. A thick, permanent marker produces labels that stay legible after handling, moisture, and stacking.
- Colour-coded tape or stickers. Assign one colour per room. This lets movers place boxes instantly without reading every label.
- Heavy-duty brown PVC parcel tape. Generic office tape fails under load and during transit, leading to damaged or lost items. Use a quality sealing tape rated for removal work.
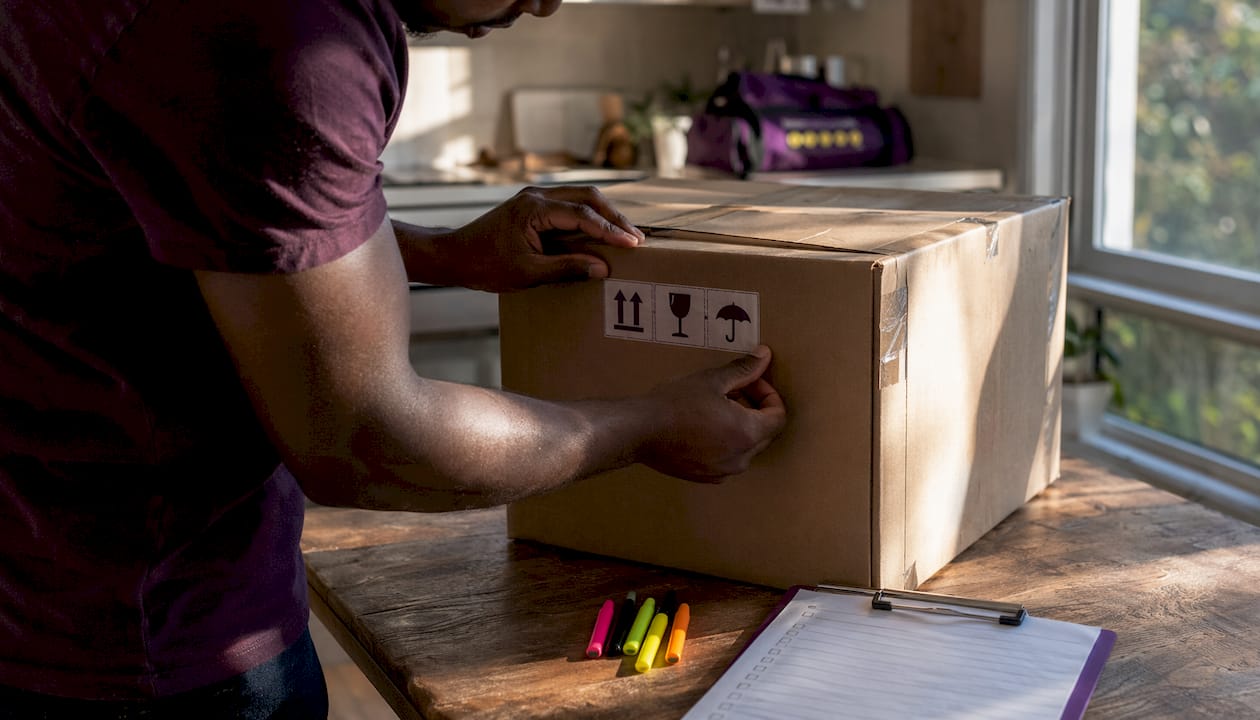
- Fragile warning tape. Pre-printed fragile warning tape removes the need to write warnings by hand on every delicate box.
- An inventory notebook or spreadsheet. Record each box number and its contents. This becomes your master reference if anything goes missing.
Pro Tip: Use a tape gun rather than tearing tape by hand. It speeds up sealing, produces cleaner edges, and reduces the chance of tape lifting at the corners during transit.
A tape gun paired with brown packing tape is the single fastest upgrade most people overlook when preparing for a move.
How to label moving boxes correctly and consistently
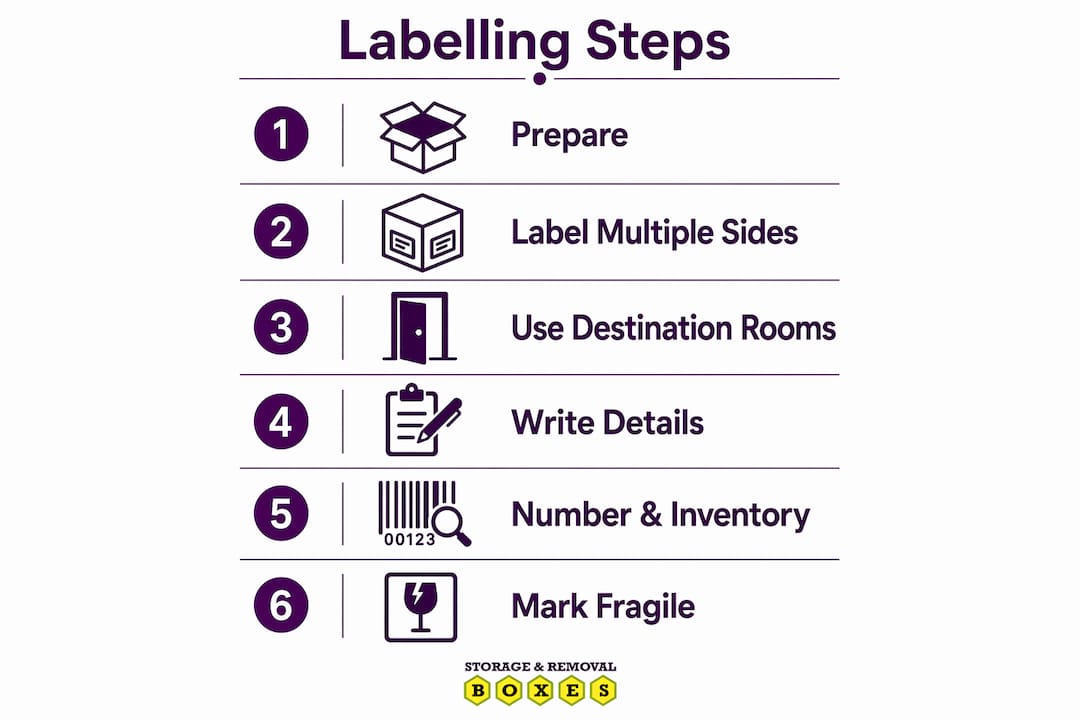
Correct labelling is a method, not just a habit. Follow these steps on every box and your removal crew will work faster, and you will unpack with far less confusion.
Label multiple sides, not just the top
Labels on the top only become obscured the moment boxes are stacked. Mark at least two sides and the top of every box. When boxes are loaded into a van or stacked in a room, at least one label will always face outward.
Use destination rooms, not origin rooms
Label boxes by destination room in the new property, not by where items came from. Your removal crew has never seen your old home. They need to know where things go, not where they came from. Write “New bedroom 2” rather than “My old study.”
Write detailed, specific descriptions
Detailed labels like “Kitchen – Plates & Glasses – Fragile” outperform a single word like “Kitchen” every time. You will not need to open five boxes to find the mugs if each box tells you exactly what is inside.
Number every box and keep an inventory
Assign a sequential number to each box and record it in your notebook or spreadsheet alongside a brief contents summary. If a box goes missing or ends up in the wrong room, you can identify it immediately.
Mark fragile and heavy boxes clearly
Write “FRAGILE” in large letters on all four sides of any box containing breakable items. For heavy boxes, write “HEAVY” and the approximate weight. Keep heavy items like books under 10–15 kg per box to protect both the box and the people carrying it. Overloaded boxes compromise lifting safety and box integrity.
A quick reference for what to write on every box:
| Label element | Example |
|---|---|
| Destination room | “Living room” |
| Contents summary | “Books and photo frames” |
| Handling instruction | “Fragile” or “Heavy” |
| Box number | “Box 14 of 40” |
| Priority level | “High” or “Open first” |
Pro Tip: Write labels before you pack the box, not after. Once a box is sealed and heavy, writing neatly on the side becomes awkward. Label the box while it is still empty and flat on a table.
For guidance on packing and labelling breakable items specifically, the Storageremovalboxes article on labelling fragile items covers the detail worth knowing.
Why colour-coding and prioritisation speed up your move
Colour-coding is the single most effective way to speed unloading, according to removal specialists. When each room has its own colour, movers can place boxes correctly at a glance without stopping to read every label.
How to set up a colour system:
- Choose one colour of tape or sticker per room. For example: blue for the master bedroom, red for the kitchen, green for the living room, yellow for the bathroom.
- Stick a colour-coded label on the door of each room in the new property. Movers match the box colour to the door colour without any instruction from you.
- Keep the colour key written on a card and give a copy to your removal crew on moving day.
Prioritising boxes for unpacking order
Not every box needs to be unpacked on day one. Assign a priority level to each box so you know what to open first.
- High priority. Bedding, towels, toiletries, a change of clothes, phone chargers, and basic kitchen items. These go into your new home first and get unpacked immediately.
- Medium priority. Everyday crockery, books, and clothing. Unpack within the first week.
- Low priority. Seasonal items, decorations, and rarely used belongings. These can wait until you are settled.
The essentials box
Pack a distinct “Essentials” box with items like a kettle, mugs, toilet paper, basic medication, and phone chargers. Label it clearly in a bright colour and keep it in your car rather than the removal van. You will have immediate access to it the moment you arrive, regardless of how long unloading takes.
Pro Tip: Tape a printed colour key to the inside of the front door at your new property. Movers can check it instantly and you will not need to supervise every box placement.
Colour-coded labels also help significantly when loading and unloading is handled by a crew who are unfamiliar with your floor plan.
What are the most common labelling mistakes?
Most moving problems trace back to labelling errors made during packing. These are the mistakes that cause delays, damaged items, and unnecessary stress.
- Labelling only the top. Stacked boxes hide top labels completely. Always mark at least two sides.
- Using vague labels. A “room plus brief contents” approach is far more useful than a single word. “Bedroom” tells you nothing. “Master bedroom – winter clothes – wardrobe left” tells you everything.
- Skipping fragile markings. Unmarked fragile boxes get stacked under heavy ones. The result is broken items and a frustrating unpacking experience.
- Labelling by origin room. Your removal crew does not know your old layout. Always label by destination.
- Using low-quality tape. Low-quality tape fails under heavy loads. Boxes burst open in transit and contents are damaged or lost. Use heavy-duty PVC tape and apply it using the H-taping method: one strip along the centre seam and one strip along each edge seam.
- Forgetting the essentials box. Arriving at a new home without immediate access to basic items is one of the most avoidable moving-day frustrations.
The H-taping method seals the centre flap and both edge seams of a box, creating a far stronger base than a single strip of tape. One centre strip alone is insufficient for transit durability. Apply three strips every time.
Pro Tip: Before sealing each box, read the label out loud. If you cannot tell exactly what is inside and where it goes from the label alone, rewrite it.
How can digital tools help you track labelled boxes?
Physical labels are the foundation of any good labelling system. Digital tools add a layer of tracking that physical labels cannot provide on their own.
Practical ways to use digital tracking:
- Spreadsheet inventory. Create a simple spreadsheet with columns for box number, destination room, contents, and priority level. Update it as you pack. This takes minutes per box and gives you a searchable record.
- QR code labels. Print QR codes that link to a digital note or spreadsheet entry for each box. Scan the code with your phone to see the full contents list without opening the box.
- Notes apps. Apps like Apple Notes or Google Keep let you create a numbered list of boxes with photos of the contents before sealing. The photo record is particularly useful for insurance purposes.
- Moving-specific apps. Several apps allow you to photograph box contents, assign rooms, and generate printable labels. These suit larger moves with many boxes.
Digital tracking works best alongside physical labels, not instead of them. If your phone battery dies or you lose signal, physical labels on the box still tell the removal crew everything they need. Use digital tools for your own inventory management and rely on physical labels for the crew.
The Storageremovalboxes guide on safe transit standards covers how box construction and labelling work together to protect contents during a move.
Key takeaways
A clear labelling system, applied consistently across every box, is the single most effective way to reduce stress and confusion on moving day.
| Point | Details |
|---|---|
| Label multiple sides | Mark at least two sides and the top so labels stay visible when boxes are stacked. |
| Use destination rooms | Write the room name in the new property, not the old one, so movers place boxes correctly. |
| Add detailed descriptions | Include room, contents, and handling instructions on every label for fast unpacking. |
| Colour-code by room | Assign one colour per room so movers identify destinations instantly without reading labels. |
| Pack an essentials box | Keep a clearly labelled box of immediate-use items in your car for access on arrival. |
What I have learned from years of watching moves go wrong
The most common complaint I hear after a move is not about damaged furniture or a late van. It is about boxes ending up in the wrong room and taking hours to sort out. Every single time, the cause is the same: labels that only said one word, written on one side, referencing the old home rather than the new one.
Colour-coding genuinely transforms the speed of unloading. I have watched removal crews work through a full van in noticeably less time when every box had a coloured stripe that matched a coloured dot on the door. No questions, no delays, no boxes left in the hallway because nobody knew where they belonged.
The essentials box is the other thing people consistently underestimate. Arriving at a new property at 7pm, exhausted, and not being able to find the kettle or a phone charger is a miserable experience. One clearly labelled box kept in your car solves it entirely.
My honest advice: spend thirty minutes before you start packing to set up your system. Decide your colours, write your room names based on the new property, and prepare your labels and tape. That thirty minutes will save you hours on the other end.
— Adrian
Get the right boxes and supplies from Storageremovalboxes
A good labelling system only works when the boxes underneath it are strong enough to survive the move.
Storageremovalboxes stocks a full range of sturdy moving boxes built for labelling and stacking, alongside colour-coded tape, pre-printed fragile warning tape, and heavy-duty PVC parcel tape. Whether you are packing a single room or a full family home, the home moving kits include everything you need in one order, with nationwide delivery across the UK. Every product is made from recyclable materials and rated for the demands of a professional removal.
FAQ
How many sides of a box should you label?
Label at least two sides and the top of every box. Top-only labels become hidden when boxes are stacked, causing delays during unloading.
Should you label boxes by the old room or the new room?
Always label by the destination room in the new property. Removal crews are unfamiliar with your old home layout and need to know where boxes are going, not where they came from.
What is the best way to label fragile boxes?
Write “FRAGILE” in large letters on all four sides and use pre-printed fragile warning tape for maximum visibility. Place fragile boxes on top of stacks and never underneath heavy items.
How heavy should a moving box be?
Keep heavy items like books under 10–15 kg per box. Overloaded boxes risk both box failure and injury to anyone carrying them.
Do you need a digital inventory as well as physical labels?
A digital inventory, whether a spreadsheet or a notes app, gives you a searchable record of every box and its contents. Physical labels remain the primary guide for your removal crew, while the digital record helps you locate specific items quickly after the move.